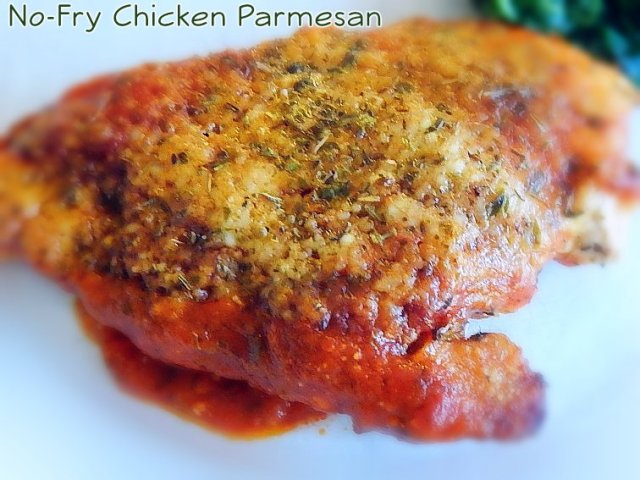
 Who doesn’t absolutely love Chicken Parmesan?? Who absolutely loves it but doesn’t love standing over a counter dredging, breading, and frying the chicken in a whole bunch of oil? I don’t know about you, but I can’t STAND frying food. Not only do I get burned from oil spattering all over the place, but frying often leads to a greasy end-product – not to mention the fact that the whole house wreaks of frying oil for the next several days after frying. Frying also doesn’t lend itself well to clean-eating. Although, I haven’t yet completely switched to clean eating, I am taking gradual steps to incorporate “cleaner” meals into our weekly rotation, and I’m working on developing cleaner versions of recipes I love. So the other night, when I wanted to make chicken parmesan without frying, I knew I had a few options…pan saute or grill. Not being able to decide on 1 method over the other, I decided to try both. Did I mention I’m totally indecisive by nature?
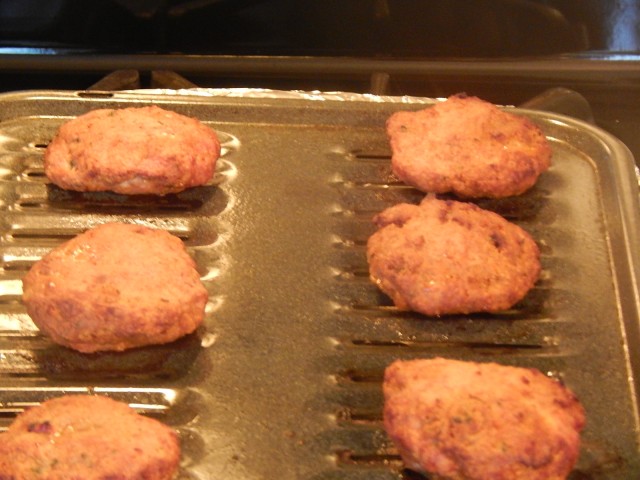
I had 2 packages of organic boneless skinless chicken breasts which are very thick, so I like to cut them in half. Using a very sharp knife, I cut each breast in half lengthwise. This is more economical than buying cutlets or thin-sliced breasts because I feel like those are too thin. I threw a bunch of seasonings on both sides, threw half the breasts in a skillet, and the other half onto a stove top grill pan. Both cooking methods worked wonders, and the chicken was so moist and tasty, that I didn’t even miss that breaded coating.
Here’s the thing with this recipe…I make my own tomato sauce using organic canned tomatoes, but if you’re short on time, you could definitely use your favorite jarred sauce. I’m adding my Italian family’s red sauce recipe that’s slow-simmered for a couple of hours. SO.FRIGGIN.GOOD! If you have the time, the sauce is so easy and well-worth the time. You won’t be disappointed. Remember, I don’t actually measure out ingredients, so these measurements are approximate 🙂
No-Fry Chicken Parmesan
Chicken Parmesan
Measurements are “to taste” and approximate. Adjust as desired.
3 boneless skinless chicken breasts
1/4 cup regular olive oil, divided use
2 cloves finely minced garlic
1/2 tbs onion powder
1 tbs dried basil
1/2 tbs oregano
1/2 tsp parsley flakes
1/4 cup finely grated Parmesan cheese (the kind in a canister works great)
Kosher salt and black pepper to taste
2-3 cups tomato sauce (see recipe below)
1 1/4 cup shredded Italian cheese (mozzarella, Asiago, Parmesan, or a blend – get crazy here)
Preheat oven to 375 degrees F.
With a sharp knife, very carefully cut the chicken breasts in half lengthwise. You can also have your butcher do this for you if you’re not sure about doing it yourself. Preheat stove-top grill or skillet over medium-high heat. If using a grill, spray with non-stick olive oil cooking spray. If using a skillet, add 1-2 tbs olive oil. If using a grill, rub remaining olive oil over both sides of each chicken breast. (This step is not necessary if using a skillet).
Mix together minced garlic, onion powder, basil, oregano, parsley flakes, finely grated Parmesan cheese, salt and pepper in a small bowl. Rub seasoning mixture over both sides of each chicken breast.
Using tongs, place each chicken breast on grill. If using a skillet, you may have to add chicken in batches depending on the size of your skillet. You want the chicken to sear, not steam. Adding too many chicken pieces to the pan at once will not achieve a pretty result.
Flip chicken after 3 minutes and sear on second side for 3 more minutes. Meanwhile, coat a 9×13″ baking pan with cooking spray. Ladle 1 cup of tomato sauce into bottom of prepared pan and spread out to cover the whole bottom of pan in a thin layer.
Remove chicken from grill or skillet. At this point the chicken may not be cooked all the way through, but that’s okay!! It’ll finish cooking in the oven.
Place chicken into prepared 9×13″ pan. Ladle remaining 1-2 cups of sauce over chicken. Sprinkle shredded Italian cheese all over chicken. Cover with foil and bake in preheated oven for 20-25 minutes. Remove foil and bake for an additional 5-10 minutes to get a nice brown crust on the cheese.
Tomato Sauce
(Remember – seasonings are “to taste” and are approximate measurements. Adjust as desired.)
2 6 oz. cans organic tomato paste
1 28 oz. can organic tomato puree
1 tbs regular olive oil (not extra virgin)
2 tbs dried basil
1 tbs garlic salt
1 tsp black pepper
1 tbs Kosher salt
1/2 tbs dried oregano
In a very large sauce pan, heat olive oil over medium heat. Add both cans of tomato paste, and stir constantly with a wooden spoon. You are essentially frying the tomato paste, so continue stirring until olive oil and paste are combined and the mixture begins to stick to the bottom of the pan without burning. SAVE THE TOMATO PASTE CANS!!
Add tomato puree to paste mixture. SAVE PUREE CAN!! Stir mixture to combine. Add black pepper and stir. Fill the saved cans with water and add to the puree/paste mixture. Stir to combine. Add basil. Raise heat to high and bring to a boil. (You can recycle the cans now 😉
Add Kosher salt and stir. Reduce heat to lowest setting (You want just the slightest hint of a simmer; mixture should not really appear to be simmering at all.) Let simmer uncovered for 1 1/2 hours to 2 hours. Stir occasionally (about every 15-20 minutes). Add oregano for last 30 minutes of simmering. Remove from heat and serve over pasta or use in your favorite Italian recipe. Transfer leftover sauce to freezer-safe container and freeze for up to 3 months. This sauce freezes beautifully.


